Light Painting 1/4: Cowboy Gear: Dave Black Workshop
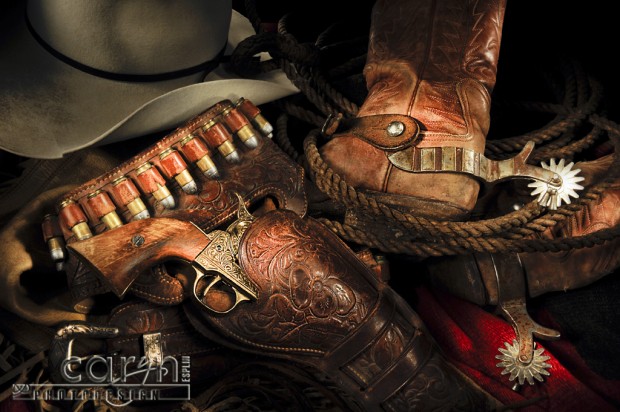
This is the first of four of the light paintings I did in Dave Black’s workshop at Photoshop World Sept. 6, 2011. It was fun to watch this photo artist and master teacher in action.
Dave is the pioneer of this realistic type of light painting. He has been creating masterpieces for about 15 years. It was inspiring to see someone so gifted in action. It is awesome that he is willing to share and teach so others can be inspired to create in their own way. Dave truly inspired me at the Spring Photoshop World when he introduced his style to those in attendance. I instantly knew this was for me, because I love how artistic it is. You shoot in total darkness and use flashlights as a paintbrush to “paint in” the light and reveal the subject from the dark. I soon realized how difficult it is, but I have practiced all summer to see how much I could improve.
Light Painting Workshop: Photoshop World – Sept. 2011 in Las Vegas:
When I noticed that Dave Black was teaching a hands-on Light Painting workshop as a pre-conference session of Photoshop World, I jumped at the chance to see him in action. I was fortunate to get into Dave Black’s pre-conference Light Painting workshop before it sold out. He did not disappoint. He is a master teacher and artist, and all-around nice guy.
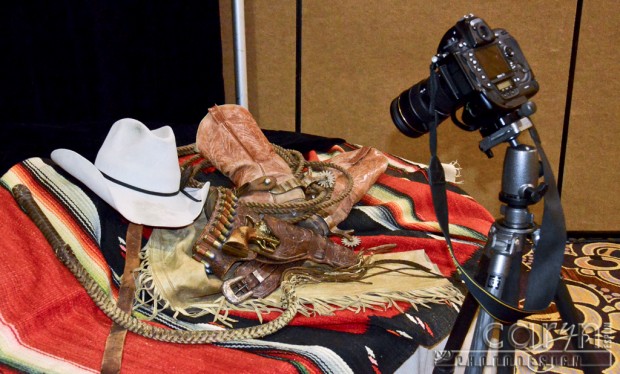
Dave set up four scenes for us to paint. Then we turned off all the lights and took turns to see how we could each do with a flashlight to light our own image. This is the first of four images I captured during that workshop in Las Vegas on September 6, 2011. Thank you for being such an inspiration, Dave Black!


Caryn, Wow light painting is such an amazing technique. Every picture you show us just makes me want to try it. The finish look is so great.
Good job!
Thanks for commenting, Jamie. You made my day with your generous comment. I do love light painting, but I have a lot to learn, and it is time consuming. It is good to know how it looks to others. Thanks!
This is my favorite light painting you did! Absolutely B-E-A-UTIFUL! Enough said!
-Dano
Thanks, Dano! I think it is my favorite too, but I must say I like the blur from the tilt-shift lens on the fishing gear.
I love all of your light painting photos and am totally jealous that we did not get to go to Photoshop World when I was at BYU-I 🙂
It is so GREAT to hear from you, Adrian! It would have been so fun to have you along on the Vegas trip for Photoshop World! I still remember good times from Bannack Ghost Town and that awesome old lace dress. I still tell my classes about it and I wish I had it for them to dress up in. When I told them about it last semester, one girl went to DI and bought a red frilly old dress and everyone took turns (at least the girls… haha) modeling as a Saloon girl with boots and all! She donated it so I can take it each time we go to Bannack. Anyway, thanks for starting the idea! I hope all is well. Drop me an email sometime! How did you find my website? Also, when I replied to this comment, did it email you to let you know?
Very impressive work thuurghoot your blog. I am a senior QE on Photoshop and would be interested in your opinions/ideas about painting within Photoshop. Please contact me at mshaw at adobe dot com. Feel free to delete this post.
For those of us who might want to give this a go, can you tell us the shutter speed/length and aperture for the shot above?
I really like how you highlighted/focused on the metal parts (gun, spurs, ammunition), and how the detail of the scrolling in the revolver.
Looking forward to the rest in the series.
Thanks for the question, Tim! Here are some tips for trying a light painting:
1. SET THE SCENE: Arrange your tabletop items and take a sample shot in the light to check composition.
2. TRIPOD & SELF-TIMER: Place your camera on a tripod and activate your 10-second self timer.
3. CAMERA SETTINGS: Set your camera to Manual mode with a 30-second shutter speed, f/16 aperture, and ISO of 100 for starters.
4. LOCK THE FOCUS: With the lights on, press your shutter halfway and lock your focus. It is best to use Spot Metering to focus on something that is about one-third of the way into your shot when you measure the closest object to the furthest object. Once you have a locked focus, turn the autofocus on your lens to Manual focus, so it won’t try to refocus when you take the shot.
5. TURN ON FLASHLIGHT: Get your LED flashlight turned on and ready.
6. TURN OFF LIGHTS & PRESS SHUTTER: Turn out your lights and press the shutter and get in position during the 10-second timer.
7. START PAINTING WITH LIGHT: Move your flashlight as if you were painting the light in. This helps to feather the edges. Stay close to the subject (about 10 inches) and do small areas for about 3-5 seconds each. Be careful not to just stand back and flood the whole scene with light.
8. CHECK AND READJUST: Adjust your camera settings or length of light painting strokes through trial and error. Depending on the strength of your flashlight, amount of ambient light and camera settings, results will vary, For example, if I don’t have enough light in my shot, I may boost my ISO up to 200 or 400.
This takes a lot of practice so don’t get discouraged. Try, try again! I hope this helps? Please let me know how it goes and give me a link if you get a good shot? Feel free to ask more questions. Good luck!
I adore this photo! Thanks for sharing it and your technique.
Thanks, Curtis!