Follow these step-by-step instructions to set up your free WordPress Blog
WordPress is the industry standard for quick, inexpensive, customizable websites that have superior Search Engine Optimization. You can start by using a free WordPress site *that has “wordpress” in the URL and less features, then later you can easily import your posts to a self-hosted WordPress website. Self-hosted WordPress websites require you to pay for hosting, but will allow you more SEO (Search Engine Optimization) options and success.
DIFFERENCE BETWEEN WORDPRESS.COM AND WORDPRESS.ORG:
Using www.wordpress.com is for setting up free blogs when you want to have wordpress host the blog. Hence, “wordpress” will be part of the web address (URL). When you are ready to setup your own self-hosted full WordPress website, you go to www.wordpress,org. For a self-hosted site, you will need to pay for hosting, through a company such as BlueHost. You get one free domain name (URL) with hosting. This name will not have “wordpress” in the URL web address. I recommend you use the DIVI template from Elegant Themes and a variety of SEO plugins and practices to get the Google spiders to crawl your posts and put you at the top of large search topics. Then when someone searches those topics, they will see your work and come to your website. So when they get there, they need to see a clear message and find your contact information.
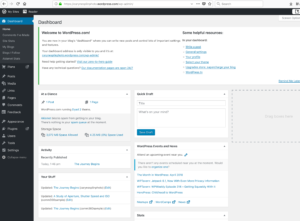
IMPORTANT – USE DASHBOARD TO SET UP BLOG: To open your REAL Dashboard for proper customization, add “/wp-admin” to the end of your blog URL. Example: https://comm300sample.wordpress.com/wp-admin
BLOG SETUP
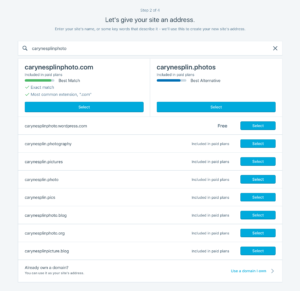
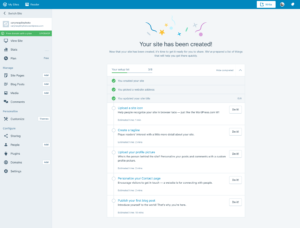
- SETUP A FREE WORDPRESS BLOG: Go to https://wordpress.com/ and follow the prompts to create an account and choose a domain name
(web address.) When they try to get you to pay for a custom name, I suggest you skip it until your build a self-hosted website. Just keep choosing the “free options” as you go through the setup.
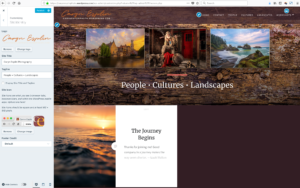
- CHOOSE A THEME: For now it will be less confusing to use the Default theme. It will allow you to add a banner image, choose the fonts, preset color schemes, and backgrounds. Later you may want to try one of the free themes such as Dyad 2, shown in this example: https://carynesplinphoto.wordpress.com/
- FOLLOW THE STEP-BY-STEP PROMPTS TO CUSTOMIZE: Add a logo, site title, tag line, header image, color scheme, etc. Make sure you hit PUBLISH each time you change something to add that item to your site. Note that your main home page will show your most recent posts first with the default theme. Other themes will allow you to customize your home page.
- SET UP A NAVIGATION MENU: Set up a navigation menu that appears at the top of your pages to organize your content. Each time you create a new post, you can assign it a category and it will automatically be added to a page in your menu. But to get this to work, you must set up categories first and add those
categories to your menu. Keep in mind that if you add a Page, your posts will not be added automatically. You will have to build everything on that page separately. So for now I recommend you use categories as your pages. Follow these steps to set up your navigation menu at the top of your site. To do this you will need to open your more advanced “Dashboard.” First make sure you have published your site, then VIEW YOUR SITE by clicking that option in the top left of your edit view in your site.
- DASHBOARD: To open your REAL Dashboard for proper customization, add “/wp-admin” to the end of your blog URL. Example: https://comm300sample.wordpress.com/wp-admin
- SET UP CATEGORIES FIRST: Go to Posts > Categories.. then add the categories you want. Be sure to SAVE before exiting this page! This sample site has a HOME page which is the default automatic blog post page that shows all your posts in order with most recent first. The next four tabs that look like page are actually categories. Your posts assigned to that category will show up on these CATEGORY PAGES. So when you create a new post to display recent photos and write about them, be sure you choose a
category before you publish your post. If you forget, no worries, just open it up and edit it and choose a category. Once you do that, (save and publish) then you will see that post show up on that page in your navigation menu. See this example. When you click on Photography, you will see the SME post that was assigned the photography category: https://comm300sample.wordpress.com/
- SET UP MENU: From the Dashboard…Go to Appearance > Menus. Click on Categories > Show All. Select your categories and “Add” them to the menu. Hit SAVE ! View your blog to see if the categories show up in the top menu?
- ADD A NEW POST AND ASSIGN A CATEGORY! Go to Posts and add a new blog post but be sure you SELECT A CATEGORY such as PHOTOGRAPHY so it will show up in that tab!
- VERY IMPORTANT!!!! — CUSTOMIZE LARGE IMAGE SIZE! —
Before adding any blog posts, you need to customize your Media Settings so you can insert Large images into your blog post. It is important to keep your image sizes consistent. Once in the dashboard go to…
Settings > Media to set the Large display image size: (625 x 625 is required for the max height and width.) Your Landscape (horizontal) images should fill the width of your blog post. The Portrait (vertical) images should be the same size, but will not fill up the whole blog width, since they are turned the other direction. This ensures your horizontal and vertical images are both given the same amount of space or “real estate” and attention. Then when you are creating a blog post, choose “Large” image size just before you insert your images into your blog post. You will see the size options in the right side panel.
Image Prep, Sizing, and Labeling
All images must be prepped, sized and labeled according to instructions. Images for the Photography posts each week should be edited for optimal exposure, sharp focal point, colors and visual appeal. Acceptable edits include levels, saturation, slight cropping, minimal burned borders, blurring and sharpening effects. More extreme edits such as digital composites, image blending, artistic filters, distortions, grunge, text, and borders should be reserved for the Editing posts.With extreme edits you are showcasing your editing and creative skills, so you should also display the original image to show your skill in changing the image.
IMPORTANT: Save three versions of all images:
1. Original jpeg or raw image.
2. Full size, edited PSD (edited in Photoshop with all the layers and flexible editing features to be used for the final photobook… OR…images saved with edits in the Lightroom catalog, that have been edited in Lightroom.
3. Blog-sized jpegs sized with the SHORT SIDE AT 1080 pixels… named with your name first, then key words.
SIZING & NAMING
1. SIZING: Once the psd has been saved in its original size, then a smaller jpeg should be prepared for blog display. Points will be deducted for images posted in the blog that are not sized to 1080 px on the SHORT SIDE. Larger images are slow to upload, and you don’t want to give away your high res images. When clicked, images should expand to their full 1080 pixel size, and be visible in their entirety without scrolling. Follow these steps to optimize images for a blog: In Photoshop, go to Image- Image size and check the Resample box. Then change the pixels (at the top) so the SHORT SIDE IS 1080 pixels. Let the other side adjust automatically. This size will load quickly, but look great on any screen.
2. NAMING: Save the image so the first part of the jpeg filename is your name. Example: JakeSpencer-Tetons.jpg. This is important to SEO and protecting your copyright.
INSERTING IMAGES in Blog Post
Once in your DASHBOARD (See Blog Post SETUP above) go to Post – New Post, Insert your sized and named images. Click LARGE size image and change LINK TO — MEDIA FILE so images are clickable!
IF YOU FAILED TO SET UP YOUR LARGE MEDIA SETTINGS to 625 pixels.. do so now BEFORE INSERTING IMAGES.
Go to SETTINGS – MEDIA: Set up your WordPress blog so you can insert Large images into your blog post. It is important to keep your image sizes consistent. Once in the dashboard go to…
Settings > Media to set the Large display image size: (625 x 625 is required for the max height and width.) Your Landscape (horizontal) images should fill the width of your blog post. The Portrait (vertical) images should be the same size, but will not fill up the whole blog width, since they are turned the other direction. This ensures your horizontal and vertical images are both given the same amount of space or “real estate” and attention. Then when you are creating a blog post, choose “Large” image size just before you insert your images into your blog post. You will see the size options in the right side panel.
Clickable Photos — LINK TO MEDIA FILE:
All images posted to your blog should be clickable, meaning we can click on it to see the full image size of 1080 on the short side. When you are inserting the image into your post, change “Link to” and set it to Media File. Once your post is up, test it and make sure that your photo can be clicked on and goes large when you do click on it. If it is not clickable.. click on an image in your post.. Choose the PENCIL icon – EDIT — then look for “LINK TO” and choose MEDIA FILE instead of NONE. When done, hit save and Update for that post. Once you change this LINK TO MEDIA FILE setting, it should stay as the default option.
