We took a trip to the Roaring Camp Railroads in Felton, California in July and it was a blast! We rode this old steam engine through a gorgeous redwood forest and it was fun to see how they still operate these beautiful old trains. The conductor and engineer were the real deal and I was wishing I had the whole family along. They also run a train down the mountain to the beach- boardwalk in Santa Cruz. Now that is a fun little town. Sometime I want to return for sure. They had beach volleyball setup, and an entire carnival set up along the boardwalk.
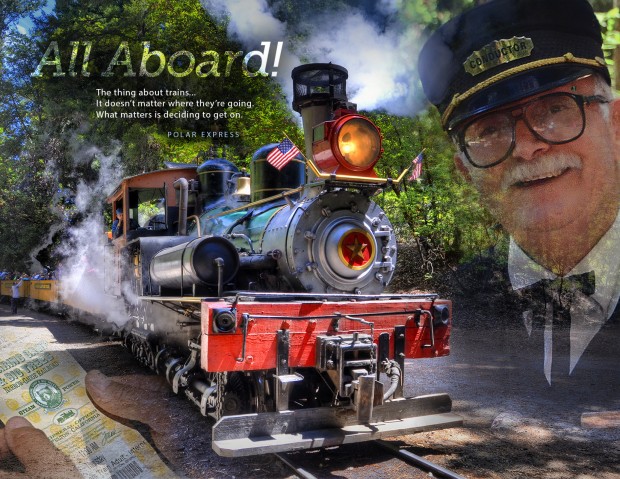
So I took my three favorite images from the excursion and blended them together in a montage. This is not to be confused with a collage, where images are cut out and placed on a background image in full opacity. To be a true montage, in my opinion, the pixels in your images must intermingle, so they become one. Notice how you can see through the conductor and he seems to melt into the train and forest. No hard edges are allowed!
TRY OUT THE TUTORIAL WITH MY IMAGES
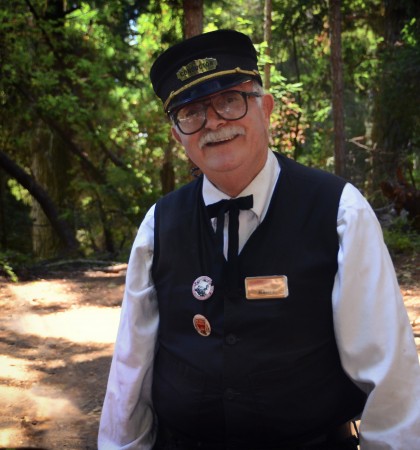
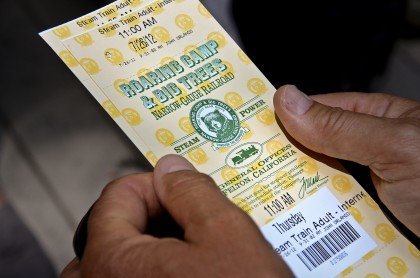
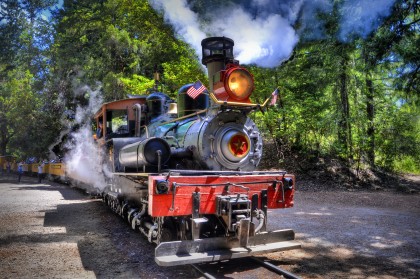
You have my permission to download these four images and try out the tutorial. Just click on an image to make it larger, then right click to download. All I ask is that you leave my name in the .jpg filename and provide a link to my website and list my name when you use the images or post them.
This is an activity I created for my students in Comm 130 Visual Media, part of the Comm Dept. at BYU-Idaho in Rexburg, Idaho. Have fun with it!
Photoshop Masking Introduction
If you know some basic editing techniques in Photoshop, it is time to start using layers and masks to blend images. If you stack two images, they will be on two separate layers, but you will only see the layer on top. So you can reduce the layer opacity of the top layer to see through to the lower layer. Or just add a layer mask to the top image, then paint with a black brush to hide parts of the image. Then if you want to reveal that layer again, you just add white paint to the layer mask.
Black paint hides; White paint reveals!
Then you can reduce the opacity of your brush to get a gradual blending effect. This gradual blending technique will help you create a photo montage. You don’t want any hard edges. Instead you want an intermingling of pixels so you can see parts of both images where they merge. Take time to practice this important image editing skill. Complete the reading assignment and this learning activity so you can master the masking technique.
Definition of Montage: When the pixels of two or more images are gradually blended together to become one. (A collage is when you cut out images with hard edges and they are fully opaque. So they look pasted on the background image.)
Masking Tutorial
Follow these steps for a gradual blending effect to complete the activity:
1. View the P4A-TrainMontage example, so you can create a close facsimile.
2. Open the three provided images in Photoshop.
3. Start with the background train image. Click the crop tool and open the dropdown on the top left, then choose Size and Resolution. Enter 11 inches by 8.5 inches with nothing in the Resolution. Reposition the crop tool as desired and double click to make the crop. (Check the example to know where to crop.)
4. Select the image of the conductor. With the lasso tool, make a selection with wide margins around the conductor, so you will have room for a gradual blend.
5. Click the Move Tool (black arrow) and drag the “conductor” to the right side of the background train image.
6. Add a layer mask to this top “conductor” layer.
7. Hit B to load the brush tool and make sure the hardness is turned down in the top menu bar. Be sure that black is your foreground color.
8. Use a smaller soft-edged brush at 100% opacity to hide the hard outside edges.
9. Use a larger soft-edged brush at 30% opacity to gradually blend the top image into the bottom image.
10. Drag the train ticket image into the lower left side of the background layer. Except this time do not make a lasso selection. Just drag the entire image on top of the train layer, then hold shift to drag the image smaller as needed to fit. (Remember, never drag images larger!) Then follow steps 5-8 to blend in this image.
11. Save the project as a .psd to keep the layers for future editing. Then flatten the layers and save the image as a jpeg.
TIP: Flattening the layers before you save your file as a jpeg will make it about four times smaller, but it will still be high quality!

Love this train HDR, So vibrant!! And that steam just pops! MONEY
Thanks for your great post. Really I like your post very much and you highlighted many important things.The Train HDR was awesome. Waiting for your next post.
Now I montage my photo in the right process. So many thanks for your great help. Love your blog.