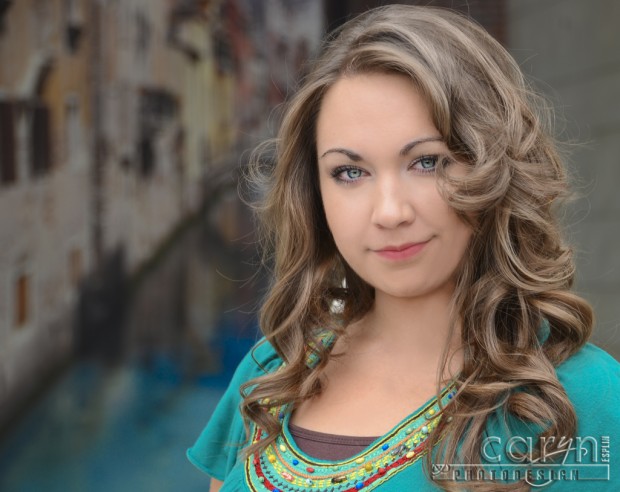
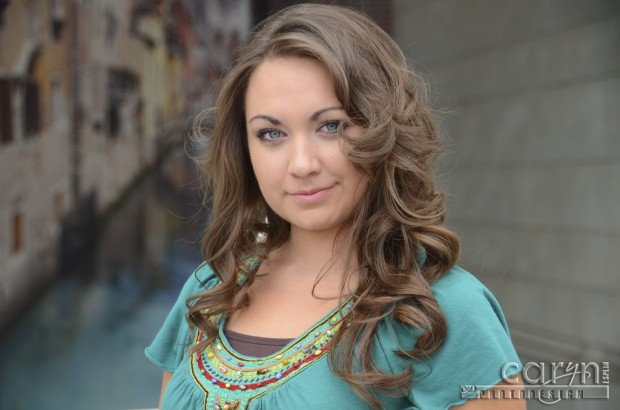
I took this shot of Erica Arguello in front of the Venetian, in Las Vegas, while we were attending Photoshop World September 5-10, 2011. Erica is our new BYU – Idaho Photographics Society President for the fall 2011 semester. She is planning some great events, so check it out at byuiphotographics.com

PORTRAIT RETOUCHING in Camera Raw / Photoshop: Erica at the Venetian by Caryn Esplin... I used some of my usual retouching tips, then tried a few new tricks I just learned at Photoshop World from the famous Photoshop expert, Scott Kelby. (The world's top selling computer book author)
Okay, some of you want to know what edits I did…
SUBTLE EDITS – When the model is this stunning, and the light is this good, be sure you don’t overdo the edits!
1. CAMERA RAW ADJUSTMENTS: I opened the original image in Camera Raw, where I adjusted the colors. You can drag sliders to change just one color at a time. I mainly lowered the luminance on the blues, and increased the saturation a bit.
2. SKIN: I copied the layer first. Her skin is awesome, so I just did a little smoothing. I used a brush set at low opacity and flow(30%), then I sampled the skin color with the eye dropper and painted with a soft-edged brush under her eyes, and around her brows and mouth.
3. EYES: Again I made a copy of the layer, then I used a brush set at Color Dodge blending mode to lighten up the irises. Then I used the sharpening tool to slightly sharpen her eyes and brows. Be careful not to overdo this, or it looks unnatural.
4. LIPS: I sampled the darker pink color in her lips, near the center, then I painted with a low opacity/ flow brush to add her own natural color to the lips
5. HAIR: I removed the random hair on the right side of her neck and cheek with the clone stamp.
6. HAIR HIGHLIGHTS: This is the hair highlighting trick I learned from Scott Kelby last week at Photoshop World. (Usually I use a brush, set to Color Dodge). First I duplicated the layer and add a Screen blending mode. Then I added a black mask to hide the effect, and finally I used a white brush to bring back the highlights in some areas. Thank, Scott!


The original photo is very nice by itself, but the retouched photo is beautiful. I always enjoy seeing your latest creations Caryn.
It is always good to hear from you, Derek! Have you been shooting much lately? Still using the Pentax? Keep me updated. 🙂
Thanks for the comment!
She looks beautifullll, I love the Venetian, love this shot. I’m ready to see NY, NY!
Thanks, Andrea! I have one good one of you in New York, New York. I will post it soon. 🙂
I love the warmth you added to her skin, as well as the color in her lips! Will you share your tips?
Hi Sarah! Thanks for the comment. I just added my editing steps at the bottom of the post, right under the original. Let me know if you see them okay!
This image is awesome! You did such a great job with the editing here. This should have been one of the posters for the Photographics society. Ha ha, kidding of course. But seriously, this is such an amazing shot and the editing turned out so incredibly. Erica is going to make a great president and I’m excited for all the thinks she’s got planned for this semester.