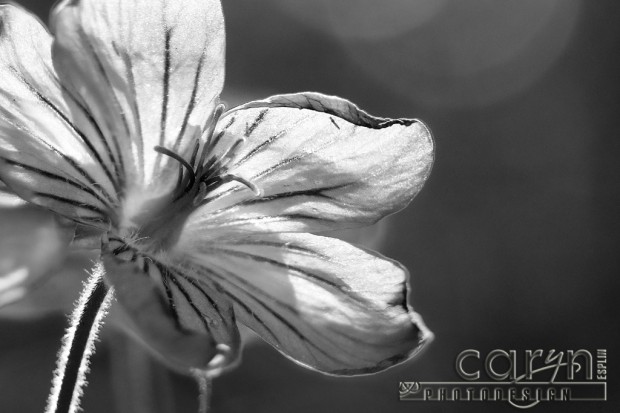
It’s as easy as 1-2-3:
1. Macro-Stacking for better focus
2. Auto Align from Adobe Bridge to Photoshop
3. Nik Silver Effex Pro for the edgy black and white
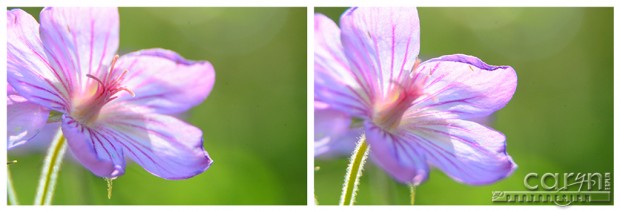
This is a composite image. I used my Macro Extension Tubes to take two shots of a small little pink sticky geranium (about 1 inch in diameter… see originals below). I did not use a tripod, but I would recommend that you do! I was able to use the auto-align feature in Photoshop to stack these two images and then I masked the sharpest details from each image. When you do macro photography, it is difficult to get the depth of field you want. I wanted part of the stem sharp, as well as the stamen inside the flower. So to accomplish this, I took two different images with the focus on different parts of the flower.
Then from Adobe Bridge I selected both images and went to Tools > Photoshop > Load Files into Photoshop Layers. Then I selected both layers once they opened up in Photoshop and hit Edit > Auto Align. This takes care of my camera movement and aligns the features in the image so the are stacked on top of each other. Next I added a mask to bring out the sharpest parts of each layer. I had to crop the composite image because the edges were not quite aligned, due to the fact that I took these images without a tripod (bad form on my part 🙂 It is nice to know you can correct for these little foopahs in Photoshop. This is why it is equally important to be a good photographer and skilled image editor. Finally, I used Nik Silver Effex Pro to get the black and white contrasty image you see here.
Click image to see detail larger – What do you think of this process?


Another great photo, and a great technique. You always have some great tutorials. Thank you!
thank you Caryn for this post. i will be doing this today.
I am glad this inspired you, Anselm! Let me know how it goes?
Thanks, Brent! It is always great to hear from you, and I hope things are going well with your new site. 🙂 Good luck!
Great result, and I agree completely about the importance of being a great photographer AND editor. Why not take advantage of the wonderful technology that allows us so much more flexibility in the creative process!!
Thanks for the comment, Karen! It does take both photography and editing to keep up with quality digital imaging. It is just part of being an artist.
I read about focus stacking when researching star stacking. Maybe I’ll give it a whirl.
Gave it a whirl 🙂 kind of did it backwards (Restricting focus to the crosses rather than bringing more in) http://www.photoshop.com/users/benharker/albums/565552e704cc4c19a47c4afb0f97496b/view#286959a0729e4edaad86b0d8038ba746
Wow, Ben! I love this image. The lighting and narrow focus is stunning. I can see your photography is getting better and better. You have an interesting take on all three key of the most vital elements: Light – Focus – Composition. I look forward to seeing your work in Digital Imaging. Thanks for sharing the link!